Pages

Showing posts with label sewing. Show all posts

Monday, February 20, 2012

Sewing Disaster

6a01156f3d85e6970c014e871824df970d-500wi

Working full time now I wont be posting as much as I used to but I truly am back in the saddle again! First off I want you to know that I hate blogs that are used to rant. I try really hard to keep it short and sweet and pretty here at Musings from Hel. But I'm afraid I have to break that rule today =(

I have spent my last couple of days off sewing and every single time it has been a disaster!! I am getting very frustrated. Because I am very frustrated I am finding it harder and harder to pick up the same project (for the millionth time) and finish it. I am pretty ADD when it comes to my projects and if they aren't working out I take it as a sign that it was never meant to be and move on. I mean- this is my hobby- if I'm not having fun, what is the point? I feel obligated to finish this one however so how do I push threw this one? Come on- I know you guys have some stories out there of projects that drove you crazy and never thought you'd finish. Mind sharing? Leave a comment

Tuesday, April 26, 2011

Kind of Cute, Kind of Creepy

001

So remember my nephew Jack? I love this kid terribly but I live too far away to see him as much as I would like. This craft I am sharing with you today came about because I want little Jack to know me and how much I love him even though I don't see him often. I have to warn you- you might not like this craft! haha. My sister and I are not the biggest fans of it either but you gota do what ya gota do- right?

What You Need
Image to transfer
Canvas
Flannel
pillow stuffing

I got my images from Amy Karol's website, its actually one of the crafts in her book that I got from my sister this last christmas. I didn't even really look at the book for directions, I just used the idea and made it up on my own.

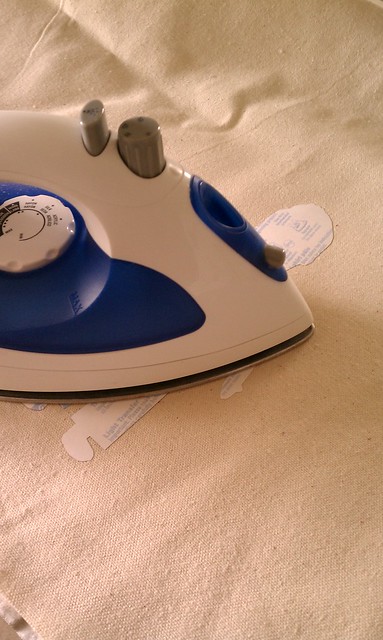
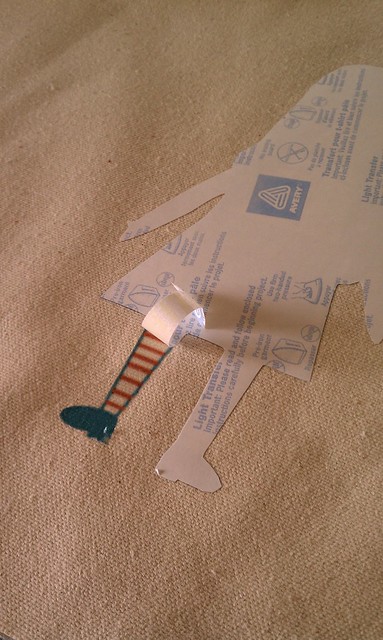
Follow the directions on the package of transfer paper. I ironed mine and then pealed off the paper.

IMAG0068

IMAG0067

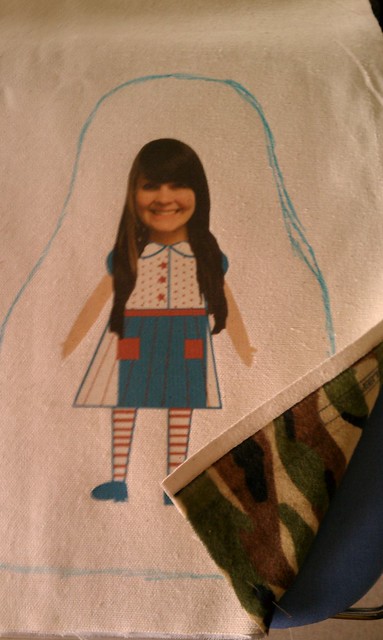
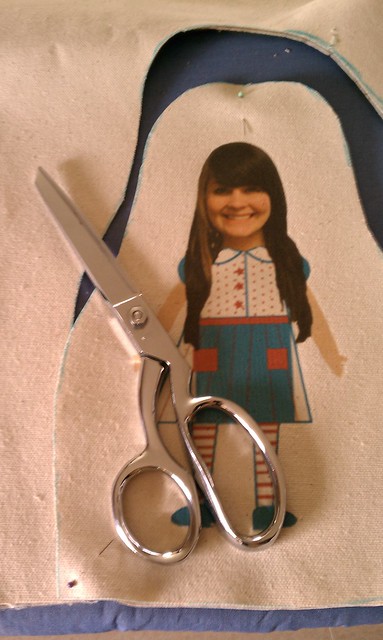
Then draw your wide outline of the image- I did mine VERY rough, it doesn't need to be perfect. remember to leave a lot of room- its going to be a pillowy stuff animal. Place the flannel behind it and pin it so you can cut out the same shape for both.

IMAG0071

IMAG0072

Place the flannel's right side and the image side of the canvas together and sew around the edge, leaving a 1-2 inch space. Turn it inside out, stuff with pillow material, and hand stitch opening closed.

IMAG0093

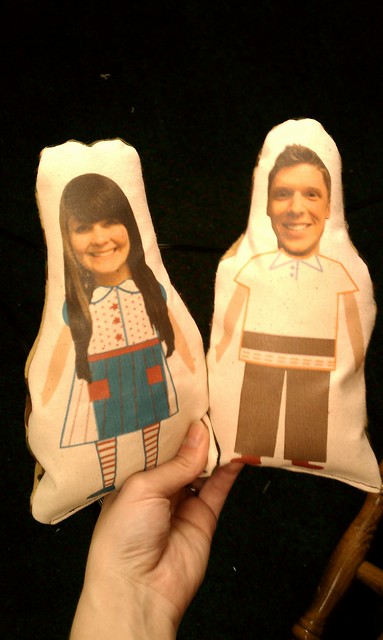
Ta Da! Stuffed Uncle Jesse and Aunt Rachel dolls. I told you its kinda cute, kinda creepy! But they do the trick, my sister said that Jack loves them and gets a big grin when he plays with them.

Saturday, March 26, 2011

Extend Your Skirt

DSC02837

So I have a favorite dress that I always feel uncomfortable wearing because its just a tad too short to me. So I decided to change it.

DSC02836

I decided to add lace to the bottom of my skirt but I just wanted it to poke out of the bottom. I've had a cheap slip for forever that I hardly ever wear and a peice of lace I got as part of a wedding gift.

DSC02838

I marked where the slip hit the bottom of my dress and cut it off.

DSC02839

Then I cut the portion of the lace I wanted to stick out.

DSC02840

Then I simply sewed the two pieces together using the widest zig-zag stitch I could, because of the lace.

What do you think?

DSC02944

Use your imagination! You can put lace on the bottom of your skirt/dress or make a slip like mine. Or don't use lace at all! Use tulle fabric, or just a cute cotton print. Here are some other cute examples I found on the web:
lace trim skirt
valentino-lace-trim-skirt-10068795_364145_330

Monday, March 21, 2011

Spice Things Up!

IMAG0073

I've been getting the itch to go shopping lately but resisted and decided to re-purpose some clothes instead. This is great for un-experienced sewers because there is no real pattern or exact way to do this- the more organic the better and its an opportunity to be creative.

What You Need
-Plain Shirt
-Strip(s) of knit fabric
-Sewing Machine
-Thread
-Pins

IMAG0074

Take you Strip(s) and lay them on your shirt where you want them to be. Pin fabric down (spacing the pins) and leave a lot of excess fabric in between.

IMAG0075

Advanced Sewers are not going to like very much- for me at least it was hard to digress in a sense and not be exact with my sewing. You pretty much sew slowly and push gathers under. Try to vary the size of gathers and space between them- I tried but mine ended up looking like I used a ruffler foot haha. I sewed closer to one side with my big ruffle but you can sew right in the middle if you are sewing smaller strips.

IMAG0076

To end mine I did some random folds and gathers and some excess fabric.

IMAG0084

Here is the opposite side of my shirt to show you where my stitching ended up.

IMAG0086

There you go! A whole new shirt for much a lot less!

IMAG0078

Monday, March 7, 2011

Finally!

DSC02817

Here you go! I promised you a little pre-maturely but here it is. A decorative pillow case for my couch. Background on the saying: Jesse got me a card on our 5 month anniversary after we were married and it said "I would totally throw myself on a bee for you" on the front. I loved it and we say that to each other every once and a while so I figured to incorporate it in our home.

DSC02820

I chose vintage buttons as my closure. I've never used buttons as a closure on my pillow cases before and I'm not really a fan. I think I'm going to hid a zipper to close it and keep the buttons for decoration.

DSC02819

I loosely based my back on this pillow on Sew, Mama, Sew. I didn't have many scraps left over from my curtains so I couldn't make it as cool as I wanted it to be but I still think it came out good.

DSC02823

Sunday, March 6, 2011

Happy Birthday To Me!

Today is my birthday and I got some great gifts that i can't wait to share with you! The first one I got was a WALKING FOOT from my mom! I am so excited! If you like to sew and don't know what this is or how to use it READ HERE. I have been wanting one for over a year now so THANKS MOM! I love it =)

Monday, January 31, 2011

Don't Pass Up On A Deal

So funny story... I've been looking for a new dress for a while and this saturday I stopped into a store in town and found this awesome dress originally priced at almost $60 marked down to $15! I took it back to the dressing room and found an issue. The dress was an extra small but I new that if I tried I could make it work. But..... I couldn't even get in the dress! The band around the waist was a tight fit and wasn't stretchy AND it didn't have a zipper or buttons. Now I could start to see why this awesome dress found it's way to the clearance rack. I figured it would be a tight fit but I was totally wrong- I got STUCK IN IT! I got it over my arms, and my head but couldn't get it past my shoulders so then I tried to take it off and realized real quick I couldn't! I started hyperventilating! haha Then I started freaking out that I was going to have to call a sales person to help me. So I took a breath, pulled myself together and yanked it off! I could tell it was going to fit great if only I could get it on! So I bought it even though I couldn't get it on. Then I ran to Walmart and bought a zipper.

I picked out the seam on the side where the tight belt area was.

I sewed in a 7 in black zipper

When I was done I realized I probably should have used a grey zipper instead of black but I was still happy with the results

The best part is- I can PUT IT ON!

So moral of the story- don't pass up on a good deal even if there may be issues in the dressing room

Saturday, January 29, 2011

Gift For Mom

So my Mom's birthday was a few weeks ago now and I decided that this year I was going to give her something a little more than just a card. After talking to my Sister and bouncing ideas off of her, the perfect gift dawned on me! A few year ago for a 3D packaging class in school I designed a re-usable grocery shopping bag. My mom LOVED it! when I showed it to her she jokingly asked me if I could make her one. So I decided I finally would!


I originally created this with the help of my sister-in-law's mom Merodene Case. This bag is pretty easy but looks great!

What You Need
One and a half yards of fabric for the outside (I used burlap)
One and a half yards of inside fabric (I just used a common cotton blend)
Sewing Machine
Common sewing tools

Cutting
Cut a peice of fabric (in both the inside and outside fabric so you'll have 2 pieces when your done) about 32 inches by 16 inches.

Cut 2 long strips in both the inside and outside fabric (so you will have 4 pieces) about 3 inches wide and 29 inches long.

Sewing
Fold both inside and outside fabrics in half (hamburger style, not hot dog style) with the right sides together (burlap doesn't really have a right side so it doesn't matter.

(on both the inside and outside fabric) Sew one straight line from the fold to the other end on both sides so you should end up with one side open for a bag like piece. ***On one side of the inside fabric sew about halfway, stop, leave about 3-4 inches of fabric, and sew the rest of the side of the bag.

TRICKY PART
take the corner of where the fold is sewn down. Flatten the bag opposite from the way its folded with the end becoming a triangle. Measure about 2 inches down from the point and pin/mark the line across the triangle perpendicular from the seam. The line should be about 4 inches long. Sew a straight line across that.

Do this for both corners of the fold for both pieces of fabric.

Straps
place an outside fabric piece and an inside fabric piece together (right sides together) so that they make one long strip. Sew one long seam on each side of the long sides. Do again with other pieces. You should have 2 tube-like pieces when your done. Turn them inside out with your fingers. Iron flat. Carefully sew another straight seam down each long side to secure it.

Bag
Turn Outside fabric around so that the "right side" is on the outside. Place inside "inside" fabric aligning the two side seams on each side. Place straps in between the two fabrics with the un-sewn edges pointing up and aligned with the rim of the bag fabric. Place straps in the place you would like them ( I placed mine about 2 1/2 inches from the side seams). Pin down the entire top rim including the straps. Sew one seam along the entire circle, I did this twice to strengthen the seam.

Find the hole you left in the "inside" fabric and pull all material out so the bag should be right side out. Take hole on the "inside" fabric and fold inside so it matches the rest of the seam and pin down/together. Sew along that area very close to the edge until the side is closed completely. Push fabric inside the "outside " fabric. Make one more seam along the top ridge to secure it.

Sorry I don't have like any pictures for this one! I made my mom's bag at 2 in the morning and was not really thinking about blogging! haha. You can post any questions in the comments and I will try to answer them.


Tuesday, December 14, 2010

I Made That!


I was blog surfing yesterday and came across this picture on my ex [ =( ] co-worker's blog. I made that tie onesie! =) Linda is now enjoying her ADORABLE smily son that she has waited 7 years for! I am SO happy for her AND I'm glad that she can actually use me gift!

Sunday, December 12, 2010

Snuggie

Many of you have seen the goofy commercials they have on TV for the Snuggie- the blanket with sleeves. I made one as part of a gift for a brother-in-law so I thought I would share it! They are cheap and easy to make AND they are good for those hard-to-shop-for family members!

What You Need
2 old felt blankets (or 3 yards of 60 in wide fleece)
Thread
Sewing machine
scissors

I almost bought fabric to make this but I found some fleece blankets on sale at WalMart! It was cheaper than the fabric I was going to buy AND all the edges were already finished! It doesn't really matter- Fleece doesn't need its edges to be finished because it doesn't fray but I like it to be because it makes your gift look more professional.

CUTTING *Measure twice, cut once ;)
Fold blanket in half (long ways). measure between 12 in. an 14 in. from the top edge of the blanket down (vertical). Measure about 11 in. from the fold to the other edge of the blanket (horizontal). Thats where you place your circle for the arms. If you need a reference I got the measurements from HERE but made up my own directions (honestly they might be the same as mine- i didn't even read them! haha). Draw an oval and cut out BOTH layers (to make both arm holes)

For the sleeves, cut a 60 in. by 24 in piece of fabric. Then cut it in half so you have 2 30 in by 24 in pieces.
{sleeve pieces}

{holes for the sleeves in the "body" part}


Fold the arm pieces in half long ways and sew one straight line along the long side with edges (the side opposite of the fold) so that you have two tube-like pieces when your done.


Sewing circles
Here is a trick I learned in one of my sewing classes that I use all the time. After the "tube" is sewn, make a mark on the tip of the fold oposite from the stitch.

THEN re-fold fabric so the mark lines up with the sewed line
{its a little hard to see the black mark in this photo- sorry}

THEN make a mark on the tip of the two folds on either side. Take your circle and do the same. Since you don't have a seam on your circle just try to find the most middle of the top and bottom. Attach Points of the sleeve to the points of the body. Sew along the edge (right sides of fabric together). Then repeat for the other sleeve!

You'll be SO stylish this winter ;)

Friday, October 22, 2010

Martha Stewart is my Chuck Norris

Thank YOU Martha Stewart! She is my freaking craft hero! (sans insider trading). So I got this book for my sister because it has at TON of amazing things to make for sewers at any level and its a great reference. I loved it so much that I went back to Barnes and Noble the next day and bought myself a copy! Anyway... I've been meaning to make some covers for my pillows for my couch and decided to try out one of her ideas.


I think they turned out pretty good? don't you?

Wednesday, October 20, 2010

My Nephew Is Cuter Than Yours

So I was feeling adventurous a few weeks ago and drove down to the Beehive state by myself to visit my awesome sister and my adorable nephew Jack! We decided to make a hat as part of Jacks halloween costume while I was there... I'll let Lyndsey tell the world what he is going to be. anyway..... we made it from scratch, cuz we're cool like that, and it took a couple of tries but we got it to work. I had my camera handy and I'm SO glad I did! Jack has developed a reputation of making funny faces and I think I got THE BEST EVER! while we tried the hat on him- see for yourself.
1st try... a little too long

Money shot...